
Every winter I see the same heartbreak: a boat owner who skipped the fall lay-up, only to find a cracked block or a seized raw-water pump in spring. It's a shame because with a few hours of careful work—including proper lubrication—you can avoid five-figure repairs. These boat maintenance tips for winter are written for the marine mechanic or the diligent owner who wants to understand the chemistry behind each step. By the relevant standards (ISO 3448, ASTM D2270, NLGI), I'll explain what to use and why.
Why Lubrication Is Critical in Winterization
Water left in the engine cooling system freezes and expands, cracking iron and aluminum. But equally damaging is the corrosion that sets in when oil films drain away and exposed metal meets oxygen and moisture. In the lab we call this static corrosion or wet-storage corrosion. On your shop floor, it means pitted bearing surfaces, scored cylinder walls, and a starting point for crevice corrosion in the drive train. Among comprehensive boat maintenance tips for winter, lubrication is the most overlooked.
The oil you use in the final flush—before you seal the engine—needs to be what we term a “storage-grade” lubricant. Not every engine oil qualifies. Look for a formulation with high rust inhibition additives (passing ASTM D665, Procedure B) and a viscosity index high enough to remain on surfaces during temperature swings. For gasoline marine engines using API SN or SP, a 30-weight mineral oil works well. For diesel inboards, I often recommend a robust 15W-40 meeting API CJ-4 or CK-4, but only after you have drained any water-contaminated oil from the sump.
Application Note: In a 350-hp MerCruiser V8, the raw-water pump impeller is a common failure point. Lubricating the impeller before storage with a silicone-based grease (NLGI Grade 2) prevents the vanes from taking a set over winter. This will cost you $12 and ten minutes—cheap insurance against a $600 repair.

Step-by-Step Winterization Plan from a Tribologist
I have winterized hundreds of marine engines across the Pacific Northwest. Here is my standard procedure, with the lubrication details that many manuals skip.
1. Flush the Cooling System
Before adding antifreeze, flush the raw-water system with fresh water to remove salt, silt, and any biological film. A half-hour flush at idle is sufficient. Then drain the block, manifolds, and heat exchanger. If your engine has a closed cooling system, drain the coolant side and replace with the correct 50/50 ethylene-glycol mix rated to –50°F (-45°C)—use a refractometer to verify.
2. Change the Oil and Filter
This is the most important lubrication step. Run the engine to bring the oil to operating temperature, then drain the hot oil completely. Hot oil carries suspended contaminants out of the engine. Replace with the storage-grade oil mentioned above. Also change the filter—use one with a bypass filter option if available. Fill the crankcase to the full mark. Turn the engine over by hand or with the starter (ignition disabled, fuel shut off) to circulate the new oil to all bearing journals. In the lab we call this an “oil film preservation cycle.” On your shop floor, it means you are coating every critical surface.
3. Treat the Fuel System
Stabilize the fuel with a marine-grade stabilizer. Fill the tank to about 95% to minimize condensation. For diesel engines, add a biocide to prevent microbial growth. Run the engine for five minutes to circulate treated fuel into injectors and fuel rails. Then fog the intake with a fogging oil—I prefer a product that meets ASTM D4860 (standard for fogging oils used in internal combustion engines). This deposits a rust-preventing film on the cylinder walls, intake valves, and combustion chamber surfaces.
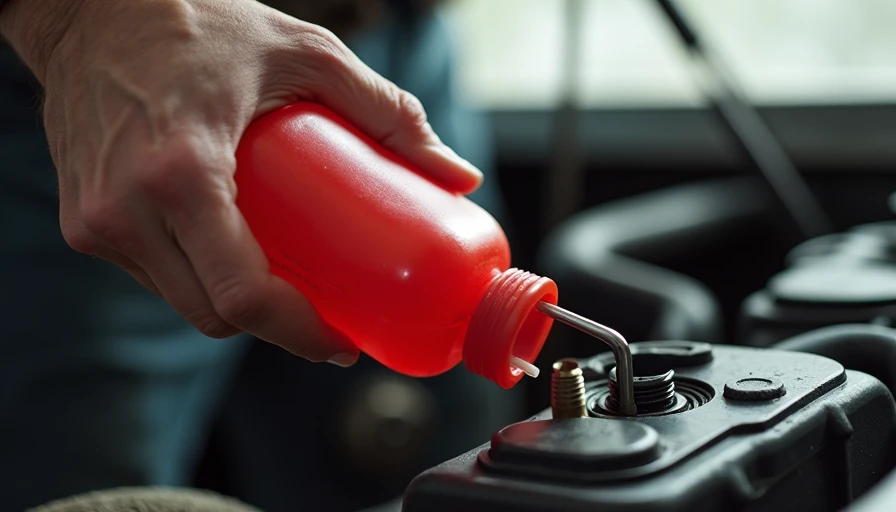
4. Grease Every Zerk Fitting
Outdrives, steering cables, trim cylinders, and throttle linkages all need a fresh coat of marine grease. Use an NLGI Grade 2 lithium-complex grease with extreme-pressure (EP) additives—look for specifications that match ASTM D217. In saltwater applications, switch to a calcium-sulfonate complex grease (also NLGI 2) because of its superior water resistance. I have seen an outdrive seize after one winter without grease on the yoke. That is a $2,500 mistake.
5. Seal the System
Close the seacocks, drain the water from the raw-water pump and lines, and store the boat with the drive in the fully down position (or as recommended by the manufacturer). Spray a light film of marine corrosion inhibitor on all exposed metal surfaces—engine block, alternator, control cables. I use a product that meets MIL-PRF-24441 Type I for salt-fog corrosion resistance.
Common Mistakes and How to Avoid Them
**Mistake #1: Using automotive antifreeze in the manifold.**
Automotive coolants often contain silicates that can gel in marine heat exchangers. Use a marine-grade propylene-glycol or ethylene-glycol antifreeze that passes ASTM D3306 (engine coolant standards).
**Mistake #2: Leaving the oil filter full of old oil.**
A used filter holds acidic degradation products and water sludge from the last season. Always replace it—and after the oil change, you can install a zinc anode kit in the filter head for additional cathodic protection.
**Mistake #3: Forgetting the trim pump fluid.**
Hydraulic trim pumps are often neglected. Check the fluid level and top off with a high-grade hydraulic oil meeting ISO VG 32 or VG 46, depending on your manufacturer’s spec. These oils have the correct viscosity index and anti-wear additives.
Conclusion
Winterizing a boat is not just about swapping fluids—it is about understanding that every lubricated surface is a potential failure point. By following these boat maintenance tips for winter, you are applying decades of tribological research to your own engine room. In the lab we call this extended equipment reliability; on your shop floor, it means a boat that starts first time in spring and runs all season without a cooling-system rebuild.


No feedback yet — submit the first.