
If you run a CNC shop, you already know that the single most common cause of premature tool wear, poor surface finish, and even bacterial growth in your sump is improper coolant concentration. **Metalworking fluids concentration testing** is the only reliable way to make sure your fluid is doing its job. In the lab, we call this a quality-control bath — on your shop floor, it means the difference between a consistent 500-piece run and a rejected batch at noon. Let’s walk through what this testing actually involves, the standards that govern it, and how to act on the numbers.
Why Concentration Matters
Your metalworking fluid is a carefully balanced emulsion of oil, water, and additives. If the concentration drifts too low, you lose corrosion inhibition and lubricity; the tool heats up, chips weld to the edge, and surface finish degrades. Too high, and you waste money on concentrate, create a sticky mess that loads grinding wheels, and risk dermatitis for your operators. Every major fluid supplier publishes a recommended operating range — typically 5% to 10% for soluble oils, 3% to 8% for semi-synthetics. Staying inside that window requires regular **metalworking fluids concentration testing**. Without it, you’re flying blind.
Application Note: A marine engine shop I consulted for was burning through carbide end mills in three hours instead of the expected eight. Their coolant was running at 2.5% — half the minimum. After we dialed the concentration back to 6% via daily testing, tool life returned to normal. That’s the real-world impact of a simple measurement.
Common Testing Methods
There are three principal ways to measure coolant concentration on the shop floor. None is perfect, and understanding their limitations is half the battle.
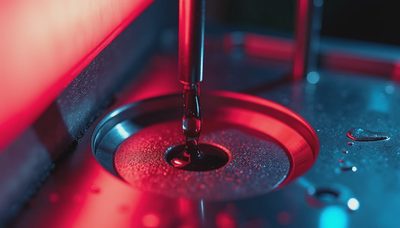
**Refractometry** — This is the go-to method. You place a few drops of coolant on a handheld refractometer prism and read the Brix scale, then multiply by the fluid’s refractive index correction factor (typically around 1.8 to 2.2 for soluble oils). It gives an immediate reading, but it’s sensitive to contamination. Tramp oil, dissolved hard-water salts, and even fine swarf particles can skew the result. You should always filter a sample through a coffee filter before measuring.
**Titration** — For more precise results, especially on semi-synthetics and synthetics, titration is the standard. A known volume of coolant is mixed with an indicator dye and titrated with a reagent until a color change occurs. The volume of reagent used tells you the concentration. This method is more accurate than refractometry but requires a kit, some chemistry, and about five minutes per test. It’s less forgiving of operator error.
**Handheld meters and digital refractometers** — These are essentially electronic versions of the optical refractometer. They cost more but offer better repeatability, temperature compensation, and a digital readout. Some models also measure pH and conductivity, which gives a fuller picture of coolant health.

ISO and ASTM Standards for Concentration Testing
You can’t manage what you don’t measure — and you can’t compare measurements without a standard. For **metalworking fluids concentration testing**, the relevant documents are:
- **ASTM E1301** — Standard Practice for Refractometric Determination of the Concentration of Aqueous Solutions. This covers the refractometer method and the correction factor calculation.
- **ISO 6613** (though this is more for testing of cutting fluids in general, not exclusively concentration) — But the standard you’ll encounter most often is **ASTM D2881** (Classification of Metalworking Fluids) and **ASTM D7049** (Standard Test Method for Metal Removal Fluid Concentration by Refractometer).
When you get a reading that seems off, check your fluid’s technical data sheet for its specific refractive index correction factor. That number is not guesswork — it’s measured by the manufacturer per ASTM E1301. I’ve seen shops using the same correction factor for every fluid and ending up 15% off. That’s a preventable error.
How to Interpret Results and Take Action
Once you have a concentration reading, compare it to the target range. If it’s low, add concentrate (never add water first — that only dilutes further). If it’s high, add deionized or softened water. The goal is to bring the concentration back to the midpoint of the recommended range, not just “in range.” Here’s a rule of thumb: a 1% shift in concentration requires adding roughly 1 gallon of concentrate per 100 gallons of sump volume, depending on the current concentration. Use a mixing calculator from your fluid supplier.
But concentration is only one part of coolant health. Always check pH (should be 8.5 to 9.5 for most fluids), conductivity (indicating dissolved solids), and look for signs of tramp oil or bacterial growth (sour smell, frothing, stringy growth). **Metalworking fluids concentration testing** is the best preventive tool, but it works hand-in-hand with a weekly coolant check sheet.
Application Note: A gear-cutting facility in Ohio was using the same coolant for six months, topping off with water only. Their refractometer readings looked fine because the water and concentrate had both evaporated proportionally — but the additive package had been depleted. The pH had dropped to 7.2, and they were seeing rust on finished gears. Regular titration and weekly pH checks caught it before a big customer shipment was affected.

Common Pitfalls in Concentration Testing
Even experienced operators make these mistakes:
- **Not calibrating the refractometer** — Distilled water should read 0 on the Brix scale. If it doesn’t, adjust the set screw. Do this daily.
- **Using the wrong correction factor** — As mentioned, each fluid brand has its own factor. A 40% error is possible if you use 1.9 when the correct factor is 2.7.
- **Testing a hot sample** — Temperature changes refractive index. Cool the sample to room temperature (68–77°F) before measuring.
- **Ignoring contamination** — A reading of 7% might be correct, but if half the measured “coolant” is actually tramp oil, your effective concentration is lower. Skim tramp oil before testing.
- **Testing only one location** — Concentration can vary across a large system. Always sample from the same return line or machine sump, not the mixer outlet.
Building a Testing Schedule
For a typical CNC shop running two shifts, I recommend:
- **Daily** — Spot check one or two key machines on second shift when the fluid is warm and well-mixed.
- **Weekly** — Full testing of every machine sump, including pH and visual inspection.
- **Monthly** — Send a sample to your fluid supplier for a total condition analysis (particle count, additive depletion, microbial count).
This schedule catches drift before it becomes a failure. In the lab, we call it a quality plan — on your shop floor, it means fewer scrapped parts, longer tool life, and lower total fluid cost. And none of it works without consistent **metalworking fluids concentration testing**.
By the relevant standards, you now have a clear path to staying in spec. The next time your refractometer tells you something unexpected, trust it — but verify with a second method, and always act on the data. Your tools (and your profit margin) will thank you.


No feedback yet — submit the first.